
Clay leaf impressions are a beautiful and creative way to capture the shapes and textures of nature in an art form. Whether you’re a beginner looking to get started with a craft project, or an advanced artist wanting to add some unique details to your work, clay leaf impressions can provide the perfect platform for creativity. In this blog post, we will explore everything you need to know about making clay leaf impressions. From the materials you’ll need, to step-by-step instructions on how to make them, this guide will give you all the tips and tricks you need succeed. So if you’re ready to start creating your own clay leaf impressions, let’s get started!
What kind of clay to use
There are a variety of clay types available on the market, each with their own unique properties. For this project, we recommend using a non-toxic modeling clay that is soft and easy to work with. We also recommend using a white clay so that the paint colors will pop against the clay surface.
What tools you need
When it comes to clay leaf impressions, there are a few tools that you will need in order to get started. Firstly, you will need some oven-bake clay. You can find this at most craft stores. Secondly, you will need a rolling pin and something to use as a cutting tool. A knife or exacto blade will work perfectly. Finally, you will need a sheet of parchment paper.
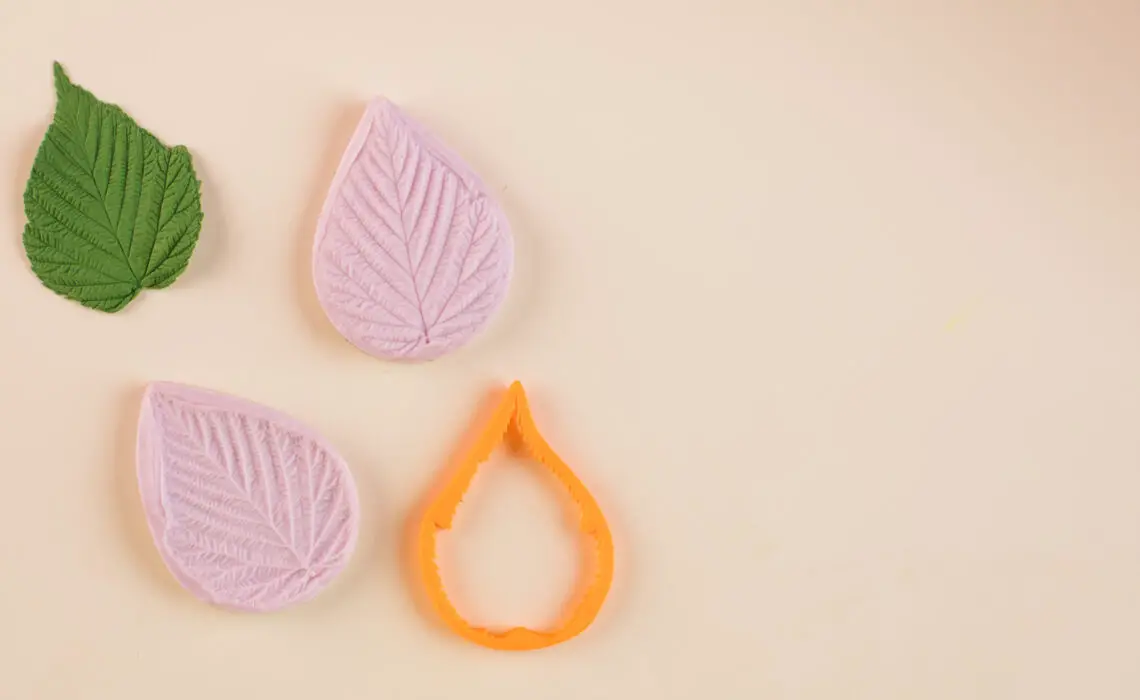
Now that you have all of your supplies, let’s get started! Begin by rolling out your clay onto the parchment paper. Once it is about 1/4 inch thick, use your cutting tool to cut out leaves of various sizes. Make sure to make some imprints on the leaves with your fingers before baking them according to the package directions.
Once they are baked and cooled, your leaf impressions are ready to be used in any project! Whether you use them as embellishments on a scrapbook page or as part of a mixed media project, they are sure to add some texture and interest.
The best leaves to use
There are many different types of leaves that can be used to make clay leaf impressions, but some leaves work better than others. The best leaves to use are those that are thin and have smooth edges. Leaves with lots of veins or thick edges can be more difficult to work with and may not produce as clear of an impression.
Some good leaves to try include: maple, oak, birch, holly, ivy, grape, and lettuce. If you’re having trouble finding leaves that work well, you can also purchase pre-made leaf templates from craft stores. Experiment with different types of leaves until you find the ones that work best for you.
How to make the impressions
If you’ve ever walked through a forest and come across a tree with leaves that have been pressed into the clay, you may have wondered how to make your own clay leaf impressions. Here’s a tutorial on how to do just that!
What you’ll need:
-A block of clay (air-dry or oven-bake)
-A rolling pin
-A sharp knife or carving tool
-Leaves of different shapes and sizes
Step 1: Start with a flat piece of clay. If your clay is too thick, use a rolling pin to roll it out until it’s about 1/4 inch thick.
Step 2: Place your leaves onto the clay, starting with the larger ones first. You can overlap the leaves if you want, but make sure they’re all touching the clay so they’ll leave an impression.
Step 3: Use a sharp knife or carving tool to carefully cut around each leaf, making sure not to cut into the leaf itself.
Step 4: Gently remove the excess clay from around the leaves, being careful not to disturb their shape.
Step 5: Allow the clay to dry completely (this could take overnight). Once dry, gently peel away the leaves to reveal your amazing leaf impressions!
Alternative methods
Clay leaf impressions are a fun and easy way to add texture and interest to your clay projects. There are many different ways to create leaf impressions, so experiment until you find a technique that works best for you.
One popular method is to press leaves into wet clay. For this technique, you will need a piece of wet clay that is big enough to accommodate the size of your leaves. Make sure that the clay is evenly moistened before pressing the leaves into it. Once you have pressed the leaves into the clay, allow it to dry completely before handling it further.
Another common method for creating leaf impressions is to roll out a sheet of clay and then press leaves into it. You can use a rolling pin or your hands to flatten the clay into an even sheet. Again, make sure that the clay is evenly moistened before pressing the leaves into it. Once you have pressed the leaves into the clay, allow it to dry completely before handling it further.
Once you have created your leaf impressions, you can use them in a variety of ways. For example, you could incorporate them into larger clay projects such as vases or bowls. Or, you could use them as standalone embellishments on smaller projects like jewelry or keychains. The sky’s the limit – get creative and have fun!
Conclusion
Making clay leaf impressions is a wonderful craft project that not only produces beautiful results, but also allows you to enjoy the outdoors and create something special at the same time. Whether you are looking for an affordable activity for yourself or your family, this is an easy and enjoyable way to spend some quality time together. With just a few simple steps, you can be sure of creating gorgeous clay leaf impressions in no time!


