
Have you ever wanted to make your very own garden buddy? Ladybird pet rocks are a great way to bring some life and color into your garden, as well as adding some unique personality. In this article, we’ll take you through the step-by-step process of crafting your own ladybird pet rocks! From gathering supplies to painting and finishing touches, you’ll be able to create your own little garden friend in no time. So let’s get started!
Introduction to Ladybird Pet Rocks
If you’re looking for a fun and easy DIY project, look no further than ladybird pet rocks! In this guide, we’ll show you how to craft your own ladybird pet rocks using simple materials like pebbles, paint, and googly eyes.
Not only are ladybird pet rocks cute and fun to make, but they’re also great for your garden! These little buddies will help keep pests away while adding some extra personality to your outdoor space. So what are you waiting for? Let’s get started!
Materials Needed to Make Ladybird Pet Rocks
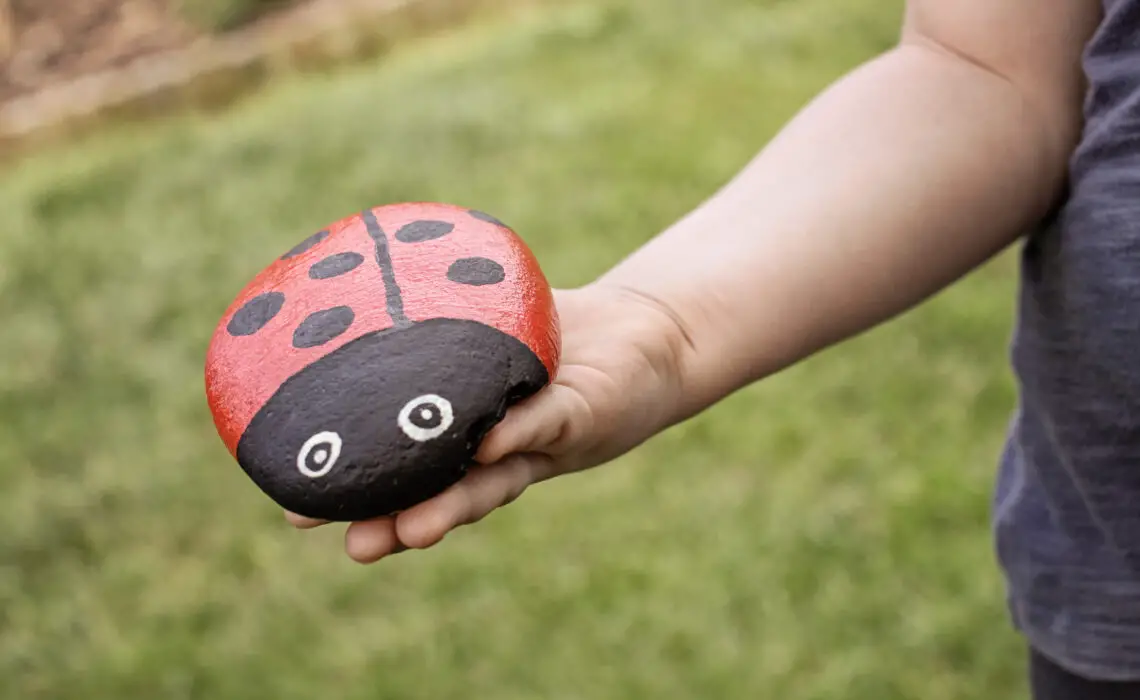
To make your own ladybird pet rocks, you will need:
-A selection of small, smooth stones or pebbles
-Paints in black, red and white
-A paintbrush
-A glue gun and glue sticks
-Googly eyes
-Scissors
Start by washing and drying your stones, then painting them with a base coat of black paint. Once the black paint is dry, use the white paint to add spots onto the ladybirds’ backs. To create the head and thorax, mix some red paint with a little black paint to create a maroon color. Paint this onto the front of the stone.
Next, cut small circles out of black paper or card for the ladybirds’ heads. Glue these on with the glue gun, then add googly eyes. Cut thin strips of red paper or card for the legs and glue these on too. Your ladybird pet rocks are now complete!
Step by Step Guide on How to Make a Ladybird Pet Rock
In this section, we will provide a step-by-step guide on how to make your own ladybird pet rock. You will need the following materials:
-1 small stone or pebble
-1 large stone or pebble
-1 piece of black string or yarn
-1 piece of red string or yarn
-A black permanent marker
-A red permanent marker
-Googly eyes (optional)
Instructions:
- Start by finding two stones or pebbles that are a similar size and shape. The smaller stone will be the body of your ladybird and the larger stone will be used for the head. If you can’t find two stones that are exactly the same size, that’s okay! Just try to find two stones that are approximately the same size.
- Once you have found your two stones, use the black string or yarn to tie the smaller stone to the larger stone. This will be the body of your ladybird pet rock. Make sure that the knot is tight so that your ladybird won’t fall apart.
- Next, use the black permanent marker to draw spots on the small stone (this will be the back of your ladybird). Then, use the red permanent marker to draw spots on the large stone (this will be the front of your ladybird). You can also add googly eyes at this point if you want.
- Lastly, take the red string or yarn and use it to make antennas for your ladybird. Tie the string around the head of the stone and then curl the ends to create antennae.
And there you have it, your very own ladybird pet rock! This is a fun and easy craft that anyone can do with just a few materials.
Painting and Decorating Ideas for Your Ladybird Pet Rocks
If you’re looking for a fun and unique way to show off your ladybird spirit, why not paint and decorate your very own ladybird pet rocks? With just a few supplies and a little bit of creativity, you can create some truly one-of-a-kind garden buddies that are sure to bring a smile to everyone who sees them.
To get started, you’ll need some small rocks (smooth ones work best), acrylic paints in your ladybird’s colours, a paintbrush, and some clear sealer. Once you have all of your supplies gathered, start by painting your rocks with the base colour of your choice. Let the paint dry completely before moving on to the next step.
Once the base coat is dry, it’s time to start adding in the details. Use a smaller brush to add stripes, dots, or other designs to your rocks. Be as creative as you like! When you’re finished painting, let the rocks dry completely before applying a clear sealer. This will help protect your design from the elements and ensure that it lasts for years to come.
That’s all there is to it! With just a little bit of time and effort, you can create some truly beautiful ladybird pet rocks that are sure to bring joy to everyone who sees them.
Tips and Tricks for Crafting Ladybird Pet Rocks
As with any crafting project, there are a few tips and tricks that can make the process of creating your own ladybird pet rocks go more smoothly. First, be sure to gather all of the supplies you’ll need before you get started. This includes rocks that are small enough to fit in the palm of your hand, paint in various colors, googly eyes, and craft glue.
Next, it’s time to start painting! Begin by painting the body of your ladybird using one color of paint. Once that has dried, add details like spots or stripes using a different color. To give your ladybird some personality, consider adding googly eyes or other small embellishments.
Finally, once everything is dry, it’s time to glue your rocks together. Be sure to do this step outside or in a well-ventilated area, as the glue can be quite smelly. Once the glue has dried completely, your ladybird pet rocks are ready to be enjoyed!
Creative Ways to Display Your Ladybird Pet Rocks
There are endless ways to get creative with your ladybird pet rocks! Here are just a few ideas to get you started:
- Paint your ladybirds in bright, bold colours and patterns.
- Use different materials to decorate your ladybirds, such as googly eyes, felt, sequins, or beads.
- Get creative with the placement of your ladybirds around your garden. Try clustering them together or arranging them in a line.
- Play around with different heights and perspectives to create an interesting display. Place some ladybirds on higher surfaces or on top of rocks or plants.
Conclusion
Crafting ladybird pet rocks is a great way to bring nature into your home. Not only are they beautiful and unique, but they can also help you connect with the natural world around you. With just a few simple materials and our step-by-step guide, you can easily create your own garden buddies that will bring joy and delight to anyone who sees them! So grab some rocks, paints, glue, and googly eyes – it’s time to get crafting!


